Install the VisioForge .NET SDKs in an Avalonia app
Video Capture SDK .NET Video Edit SDK .NET Media Blocks SDK .NET Media Player SDK .NET
This guide installs the VisioForge .NET SDKs in an Avalonia 12.1 app with Desktop, Android and iOS heads, and puts a VideoView on its main view. It ends with an app that builds and runs on the Desktop head on Windows.
All four SDKs — Video Capture SDK .NET, Media Player SDK .NET, Video Edit SDK .NET and Media Blocks SDK .NET — come in one NuGet package, VisioForge.DotNet.Core. The Avalonia VideoView is in VisioForge.DotNet.Core.UI.Avalonia. Each platform also takes a redist package, its native engine, and Android takes the VisioForge binding project, AndroidDependency, from GitHub.
Video tutorial
The video creates the app, installs the packages in Visual Studio 2026 and runs it:
Requirements
- Windows 10 or 11, x64
- Visual Studio 2026 and the .NET 10 SDK, with the Android and iOS workloads to build those heads
- Git
- A Mac with Xcode, paired with Visual Studio, to build the iOS head
- A Mac with Xcode and the .NET macOS workload to build the Desktop head for macOS
- On Linux, GStreamer installed from the distribution's packages, see Ubuntu deployment
VisioForge.DotNet.Core.UI.Avalonia is built for Avalonia 12.1, so the app is created from the Avalonia 12.1.6 templates.
Create the app
In Developer PowerShell, install the Avalonia templates, create the app, take out its Browser head, and fetch the Android binding project:
cd $HOME\source\repos
dotnet new install Avalonia.Templates@12.1.6
dotnet new avalonia.xplat -o VisioForgeAvalonia
cd VisioForgeAvalonia
dotnet sln remove VisioForgeAvalonia.Browser\VisioForgeAvalonia.Browser.csproj
git clone --depth 1 --filter=blob:none --sparse https://github.com/visioforge/.Net-SDK-s-samples.git samples
git -C samples sparse-checkout set AndroidDependency
dotnet sln add samples\AndroidDependency\VisioForge.Core.Android.X10.csproj
devenv VisioForgeAvalonia.slnx
avalonia.xplat makes a shared project for the views (VisioForgeAvalonia) and a head project for each platform: Desktop, Android, iOS and Browser. The SDK has no engine for the browser, so the Browser head leaves the solution. The sparse clone checks out only AndroidDependency from the samples repository, and dotnet sln add puts it into the solution, so Visual Studio restores it with the app.
Visual Studio may ask you to accept the Android SDK license as the solution loads. Accepting installs the Android SDK, which the Android head needs to build.
Install the packages
Right-click the shared project, VisioForgeAvalonia, open Manage NuGet Packages and the Browse tab. Install VisioForge.DotNet.Core, then VisioForge.DotNet.Core.UI.Avalonia, and accept the license.
The Avalonia template uses central package management, so NuGet writes the versions to Directory.Packages.props and the project file gets references without them. The template leaves Directory.Packages.props out of the solution: open it with File > Open > File and add a version for each redist under the two VisioForge packages:
<ItemGroup>
  <PackageVersion Include="VisioForge.DotNet.Core" Version="[2026.11.16]" />
  <PackageVersion Include="VisioForge.DotNet.Core.UI.Avalonia" Version="[2026.11.16]" />
  <PackageVersion Include="VisioForge.CrossPlatform.Core.Windows.x64" Version="[2026.11.16]" />
  <PackageVersion Include="VisioForge.CrossPlatform.Libav.Windows.x64.UPX" Version="[2026.11.16]" />
  <PackageVersion Include="VisioForge.CrossPlatform.Core.macOS" Version="[2026.11.13]" />
  <PackageVersion Include="VisioForge.CrossPlatform.Core.Android" Version="[2026.11.5]" />
  <PackageVersion Include="VisioForge.CrossPlatform.Core.iOS" Version="[2026.11.5]" />
</ItemGroup>
Take the latest versions from nuget.org. The Android and iOS redists are released on their own schedule, so their versions differ from the SDK's. Windows takes two redists, the native engine and the Libav codecs (.UPX is the size-optimized build); macOS, Android and iOS take one each.
The Desktop head
Each head takes its redist in its own project file. Right-click VisioForgeAvalonia.Desktop, select Edit Project File, and add these blocks at the end, before </Project>:
<PropertyGroup Condition="$([MSBuild]::IsOsPlatform('Windows'))">
  <TargetFramework>net10.0-windows</TargetFramework>
</PropertyGroup>
<PropertyGroup Condition="$([MSBuild]::IsOsPlatform('OSX'))">
  <TargetFramework>net10.0-macos</TargetFramework>
  <ApplicationId>com.companyname.visioforgeavalonia</ApplicationId>
  <OutputType>Exe</OutputType>
</PropertyGroup>
<ItemGroup Condition="$([MSBuild]::IsOsPlatform('Windows'))">
  <PackageReference Include="VisioForge.CrossPlatform.Core.Windows.x64" />
  <PackageReference Include="VisioForge.CrossPlatform.Libav.Windows.x64.UPX" />
</ItemGroup>
<ItemGroup Condition="$([MSBuild]::IsOsPlatform('OSX'))">
  <PackageReference Include="VisioForge.CrossPlatform.Core.macOS" />
</ItemGroup>
The template builds the Desktop head for plain net10.0, and the SDK's Windows and macOS engines need the operating system's own framework. The later properties replace the template's: net10.0-windows on Windows, and net10.0-macos on a Mac, an app bundle, which needs an application ID. Linux keeps net10.0 and takes no redist: there the SDK uses the GStreamer installed on the system, see Ubuntu deployment. The references carry no versions: those come from Directory.Packages.props.
The Android head
Open Edit Project File on VisioForgeAvalonia.Android. In the template's first PropertyGroup, change the SupportedOSPlatformVersion line to 24:
<SupportedOSPlatformVersion>24</SupportedOSPlatformVersion>
Then add the redist and AndroidDependency at the end of the file, before </Project>:
<ItemGroup>
  <PackageReference Include="VisioForge.CrossPlatform.Core.Android" />
  <ProjectReference Include="..\samples\AndroidDependency\VisioForge.Core.Android.X10.csproj" />
</ItemGroup>
Android 7 (API level 24) is the SDK's minimum on Android. VisioForge.Core.Android.X10.csproj targets net10.0-android, and a net11.0-android app references it as well.
The iOS head
Open Edit Project File on VisioForgeAvalonia.iOS. In the template's first PropertyGroup, change the SupportedOSPlatformVersion line to 18.0:
<SupportedOSPlatformVersion>18.0</SupportedOSPlatformVersion>
Then add the redist at the end of the file, before </Project>:
<ItemGroup>
  <PackageReference Include="VisioForge.CrossPlatform.Core.iOS" />
</ItemGroup>
iOS 18.0 is the minimum of the native iOS libraries. Then right-click the iOS head's Info.plist, choose Open With and XML (Text) Editor, change the value under the template's MinimumOSVersion key to <string>18.0</string>, the same version. Then add a scene manifest, the one new key, above UIRequiredDeviceCapabilities:
<key>UIApplicationSceneManifest</key>
<dict>
  <key>UIApplicationSupportsMultipleScenes</key>
  <false/>
</dict>
An app built with the iOS 27 SDK must use the UIKit scene lifecycle (the build stops with MT7199 otherwise). One scene is enough: the Avalonia 12.1 app delegate supplies the scene configuration itself.
Build the iOS head with the .NET 10 SDK. The .NET 11 SDK maps net10.0-ios to iOS 26.0, below the iOS assets of SkiaSharp 3.119.4 (net10.0-ios26.2), and the app then stops at launch with DllNotFoundException: libSkiaSharp. Pin the SDK with a global.json if both are installed.
Add VideoView to the view
In the shared project, open Views/MainView.axaml. Map the VisioForge namespace to a prefix, here vf, next to the template's own namespaces, and replace the template's TextBox with a StackPanel that holds a VideoView above the same TextBox:
The whole file after the edit:
<UserControl xmlns="https://github.com/avaloniaui"
             xmlns:x="http://schemas.microsoft.com/winfx/2006/xaml"
             xmlns:d="http://schemas.microsoft.com/expression/blend/2008"
             xmlns:mc="http://schemas.openxmlformats.org/markup-compatibility/2006"
             xmlns:vm="using:VisioForgeAvalonia.ViewModels"
             xmlns:vf="using:VisioForge.Core.UI.Avalonia"
             mc:Ignorable="d" d:DesignWidth="800" d:DesignHeight="450"
             x:Class="VisioForgeAvalonia.Views.MainView"
             x:DataType="vm:MainViewModel">
    <Design.DataContext>
        <vm:MainViewModel />
    </Design.DataContext>

    <StackPanel HorizontalAlignment="Center" VerticalAlignment="Center" Spacing="12">
        <vf:VideoView Width="640" Height="360" Background="Black" />
        <TextBox Text="{Binding Greeting}" />
    </StackPanel>
</UserControl>
The namespace is VisioForge.Core.UI.Avalonia, from the VisioForge.DotNet.Core.UI.Avalonia package. The size is only for this demo; give the VideoView an x:Name to reach it from code.
Run it
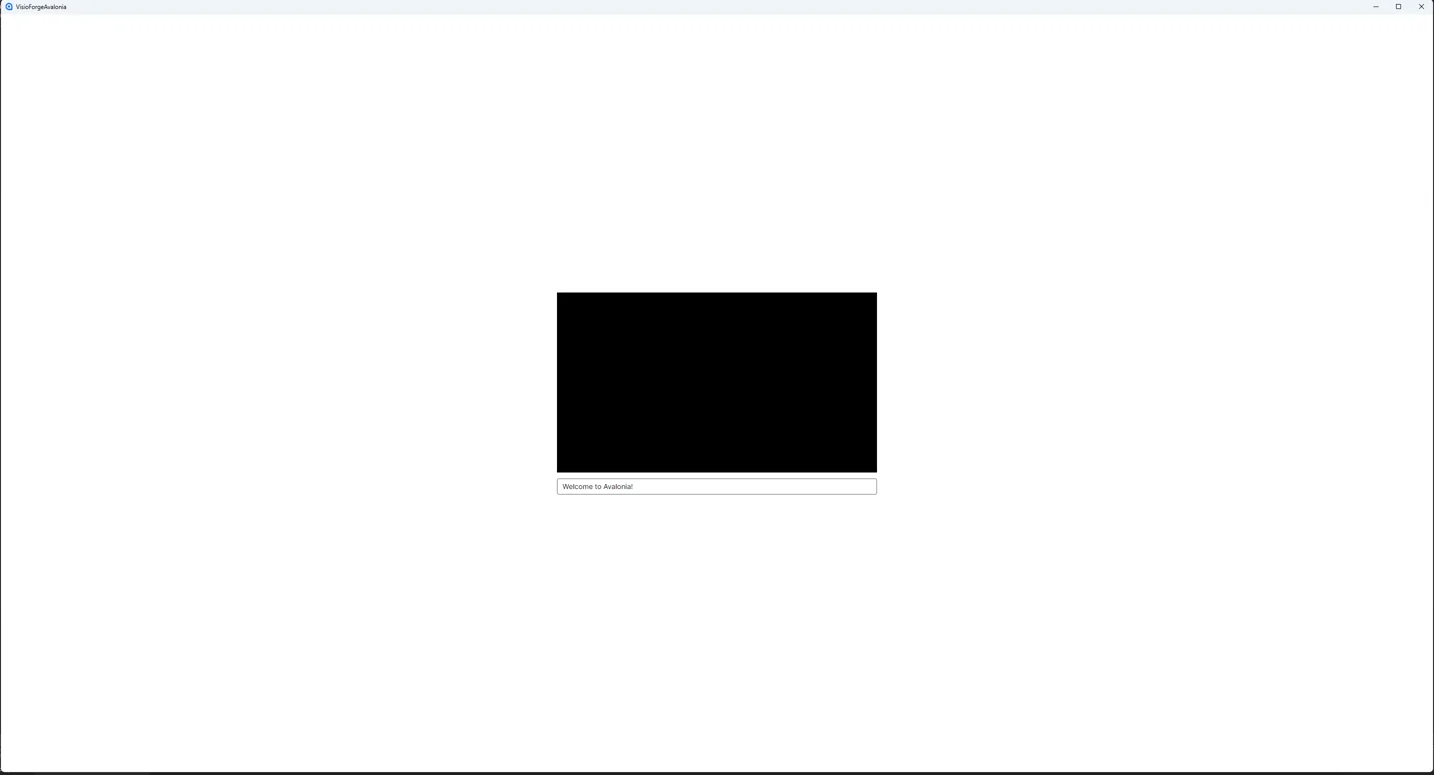
Right-click VisioForgeAvalonia.Desktop, select Set as Startup Project, and start the app without debugging (Ctrl+F5). Visual Studio builds the Desktop head for Windows with the Windows redists. The app opens with the VideoView above Welcome to Avalonia!, black until an SDK engine draws into it.
Initialize the SDK
Before the first engine, initialize the SDK, and release it on exit. In the shared project's App.axaml.cs, add using VisioForge.Core; and two lines to the template's OnFrameworkInitializationCompleted:
public override void OnFrameworkInitializationCompleted()
{
    VisioForgeX.InitSDK();

    if (ApplicationLifetime is IClassicDesktopStyleApplicationLifetime desktop)
    {
        desktop.Exit += (_, _) => VisioForgeX.DestroySDK();
        // ... the template's code
    }
    // ... the template's other branches and base call
}
InitSDK runs once for every head; Exit is raised on the Desktop head. To initialize without blocking the UI thread, call await VisioForgeX.InitSDKAsync() from an async event handler instead, such as the main window's Loaded.
Android needs the camera and microphone permissions in AndroidManifest.xml, and iOS and macOS the usage descriptions in Info.plist (NSCameraUsageDescription, NSMicrophoneUsageDescription). The deployment guides for Windows, macOS, Ubuntu, Android and iOS cover them, the native dependencies and troubleshooting. SDK initialization covers InitSDKAsync and DestroySDK in detail.
Sample applications
Complete Avalonia apps with a shared project and Desktop, Android and iOS heads, like the app in this guide:
- Media Player SDK X/Avalonia/SimplePlayerMVVM
- Media Blocks SDK/Avalonia/SimplePlayerMVVM
- Media Blocks SDK/Avalonia/SimpleVideoCaptureMVVM
- Media Blocks SDK/Avalonia/VideoMixerMVVM
The other Avalonia samples are desktop apps: Media Player SDK X/Avalonia, Video Capture SDK X/Avalonia and Media Blocks SDK/Avalonia.
Video Transcript
Overview
Let's install the VisioForge .NET SDKs in an Avalonia app, with Desktop, Android and iOS heads, and put a VideoView on its main view. All four VisioForge .NET SDKs come in one NuGet package, VisioForge.DotNet.Core. The Avalonia VideoView is in VisioForge.DotNet.Core.UI.Avalonia. Each platform also takes a redist package, its native engine, and Android takes the VisioForge binding project, AndroidDependency, from GitHub. You need Windows 10 or 11, Visual Studio 2026, and the .NET 10 SDK, with the Android and iOS workloads to build those heads, and Git. The VisioForge Avalonia package is built for Avalonia 12.1, so this video creates the app from the Avalonia 12.1.6 templates.
Create the app
Open Developer PowerShell from the Start menu, and go to your projects folder. Install the Avalonia templates, version 12.1.6. Create the app with dotnet new avalonia.xplat. It makes a shared project for the views, and a head project for each platform: Desktop, Android, iOS and Browser. The SDK has no engine for the browser, so take the Browser head out of the solution with dotnet sln remove. In the solution folder, clone the VisioForge samples repository sparsely, check out only AndroidDependency, the Android binding project, and add it to the solution with dotnet sln add. Then open the solution in Visual Studio. Here are all the commands. Visual Studio may ask you to accept the Android SDK license as the solution loads: that installs the Android SDK, which the Android head needs to build.
NuGet
Now NuGet. Right-click the shared project, VisioForgeAvalonia, open Manage NuGet Packages, and the Browse tab. Search for VisioForge.DotNet.Core and install it. Visual Studio shows the changes and the license: accept them. Then install VisioForge.DotNet.Core.UI.Avalonia, which holds the Avalonia VideoView. Both are on the Installed tab. The template uses central package management, so their versions went to Directory.Packages.props.
Redists
The redists come next. The template leaves Directory.Packages.props out of the solution, so open it with File, Open, and add a version for each redist under the two VisioForge packages. Windows takes two, the native engine and the Libav codecs. macOS, Android and iOS take one each. Here is the whole list: the two packages from NuGet and the five redists. Take the latest versions from nuget.org.
Desktop head
Each head takes its redist in its own project file. Right-click the Desktop head, and open Edit Project File. Add the blocks at the end of the file, each under the condition of the operating system that builds it, and save. The template builds the Desktop head for plain net10.0, and the SDK's Windows and macOS engines need the operating system's own framework. On Windows that is net10.0-windows. On a Mac it is net10.0-macos, an app bundle, which needs an application ID. Linux keeps net10.0. Windows takes the engine and Libav, and macOS its engine. The references carry no versions: those come from Directory.Packages.props. On Linux, the SDK uses the GStreamer installed on the system.
Android and iOS
Now the Android head: Edit Project File again. Raise the minimum to Android 7, API level 24, the SDK's minimum on Android. Then add the Android redist, and a reference to the AndroidDependency project from the samples folder. The minimum version replaces the template's own line. The rest goes in at the end of the file. The iOS head is next. Raise its minimum to iOS 18, the SDK's minimum on iOS, and add the iOS redist. The same two edits as on Android: the minimum version, and the redist reference at the end. The iOS head has one more file, Info.plist. Right-click it, choose Open With, and the XML text editor. Set MinimumOSVersion to 18.0, to match the project, and add a scene manifest above the device capabilities. The iOS 27 SDK refuses an app without a scene manifest. One scene is enough, and Avalonia supplies its configuration.
VideoView
Now the view. In the shared project, open MainView.axaml from the Views folder. Map the VisioForge namespace to a prefix, here vf, next to the template's own namespaces. And replace the template's TextBox with a StackPanel, holding a VideoView above the same TextBox. Then save. In Avalonia, the namespace is VisioForge.Core.UI.Avalonia, from the VisioForge.DotNet.Core.UI.Avalonia package. The size here is only for this demo.
Run it
Set the Desktop head as the startup project. And start it without debugging. Visual Studio builds the Desktop head for Windows, with the Windows redists. The app opens, with the VideoView above the greeting. It stays black until an SDK engine draws into it.
Next steps
Before the first engine, initialize the SDK with VisioForgeX.InitSDKAsync, and release it with DestroySDK on exit. Android needs the camera and microphone permissions in its manifest, and iOS and macOS the usage descriptions in Info.plist. Deployment for each platform is on the help site.
See also
- SDK initialization —
InitSDKAsyncandDestroySDKin detail - Install guides for Visual Studio, MAUI, Uno Platform and Rider
- Windows, macOS, Ubuntu, Android and iOS deployment